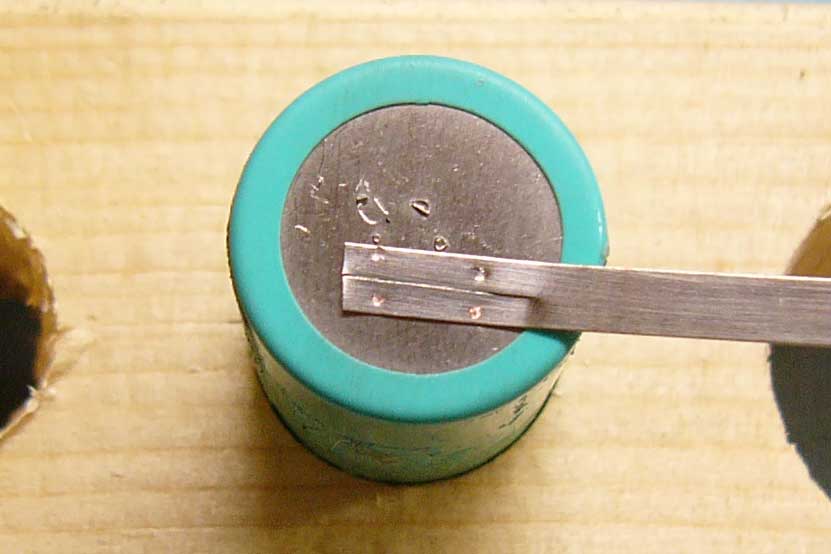
HOW TO WELD NICKEL PLATES TO BATTERIES (ATTACHING BATTERY TAB)
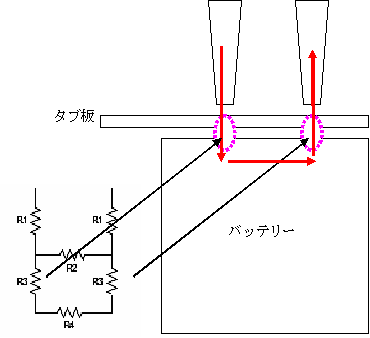
As it is shown principally in the left circuit, R3 between tab plate and battery produces the heat needed for welding. The welding quality is affected by factors such as welding current, flowing time, applied pressure, and welding materials. Welding current alters due to welding materials, surface condition, and pressure applied by the electrodes. In spot welding, the welding junction is called nugget; in order to get a good quality nugget, these factors need to be controlled. In addition, in order to ensure that the electrode itself does not weld, the electrode needs to release heat. A welder for professional welds a large number of identical materials in the same environment at high speed, thus these factors are optimally set. In comparison, a welder for personal use needs to handle different type and shape of materials. However, factors like electric current and pressure applied to electrodes, metal's conductivity and surface condition can be controlled easily through experience, so no concern is needed.
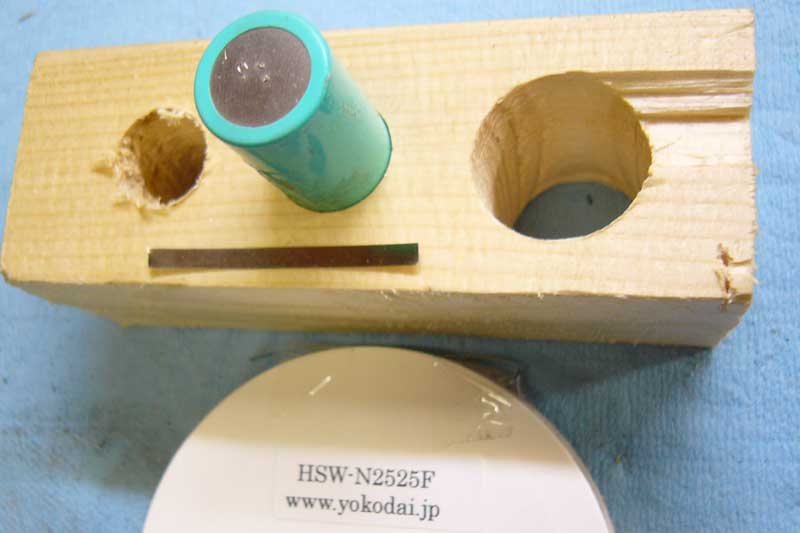
USING YOKODAI.JP SPOT WELDER FOR WELDING: OPERATIONAL VIEW (MENU)
Phosphor Bronze Plate (0.15 mm thick) Can Be Welded Just As Nickel's
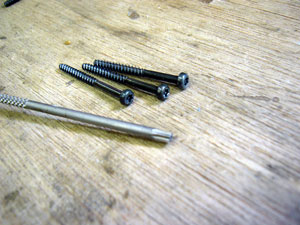
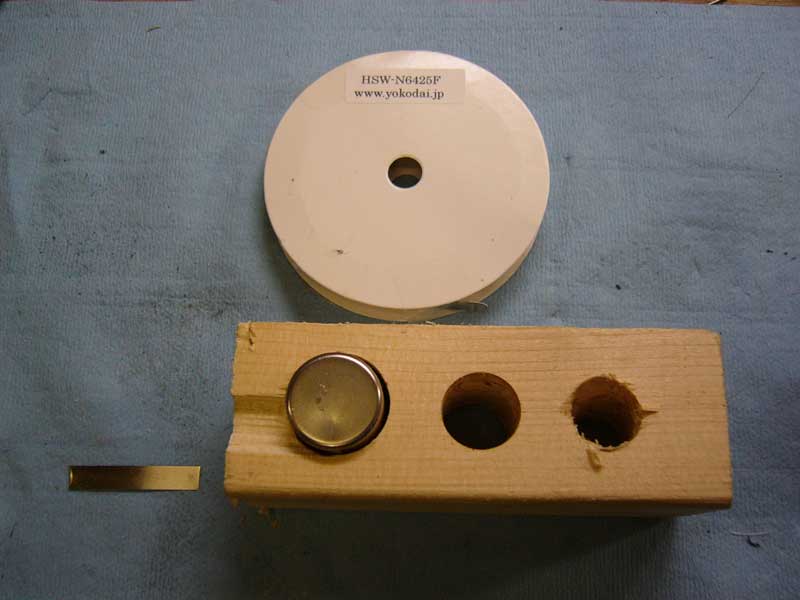
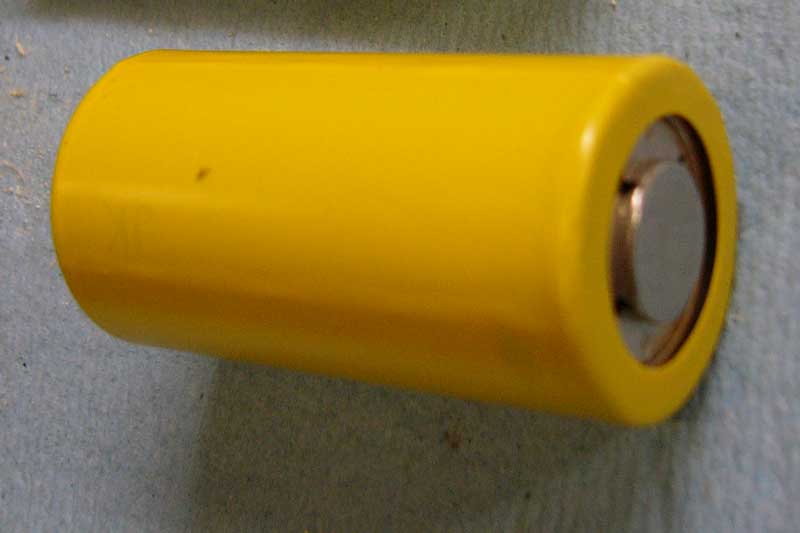
HSW-N6425F/HSW-N64 Welding Tabs Using (Nickel Thin Plate)
(w) 6.4 mm x (h) 0.15 mm
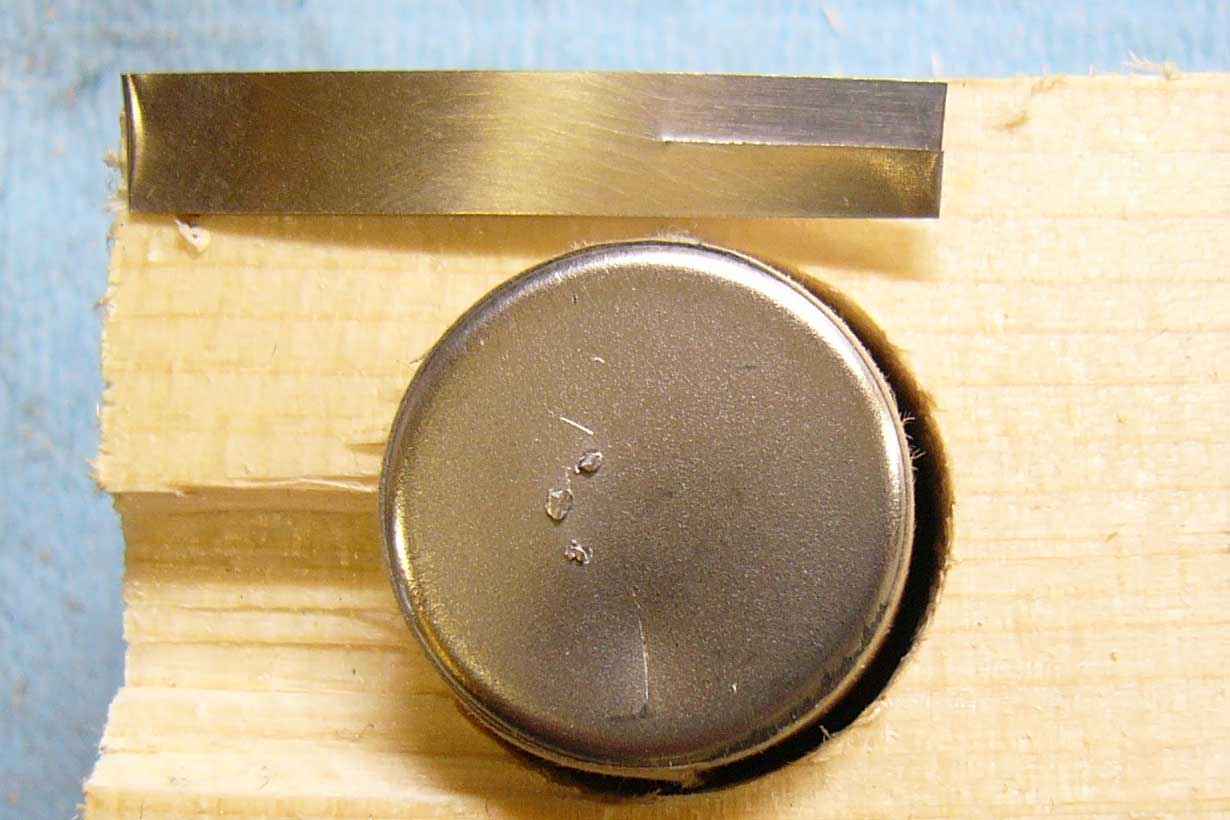
1
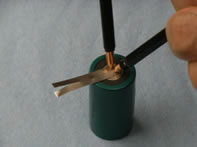
Prepare the materials. At this time, polish both nickel tabs and the batteries with Scotch Bright etc.
2
Cut a notch at the nickel tab.
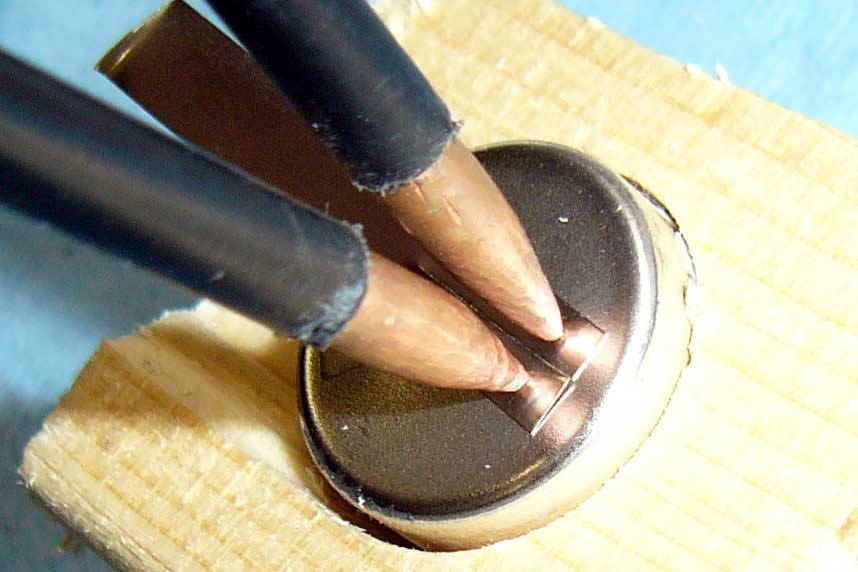
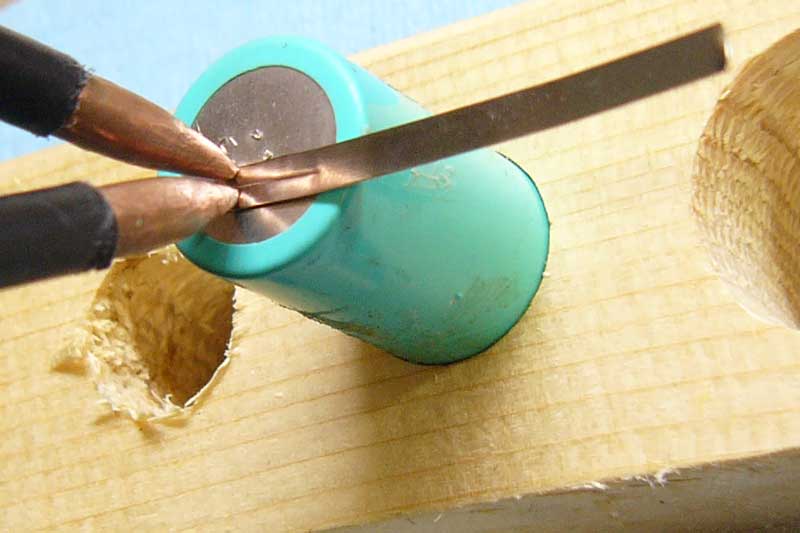
3
Weld it like this.
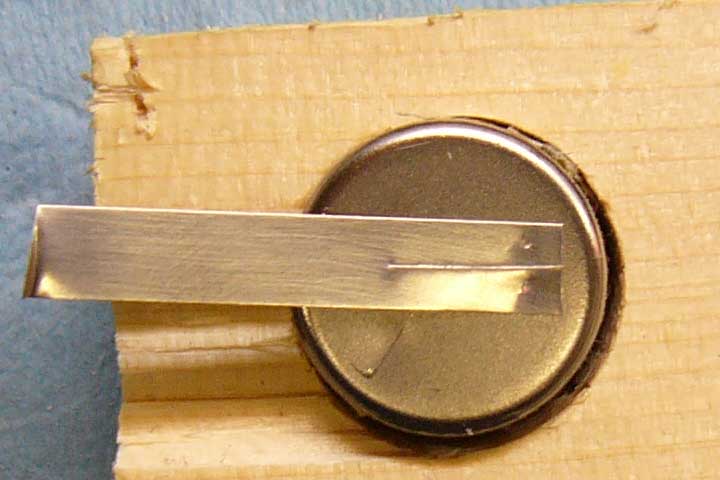
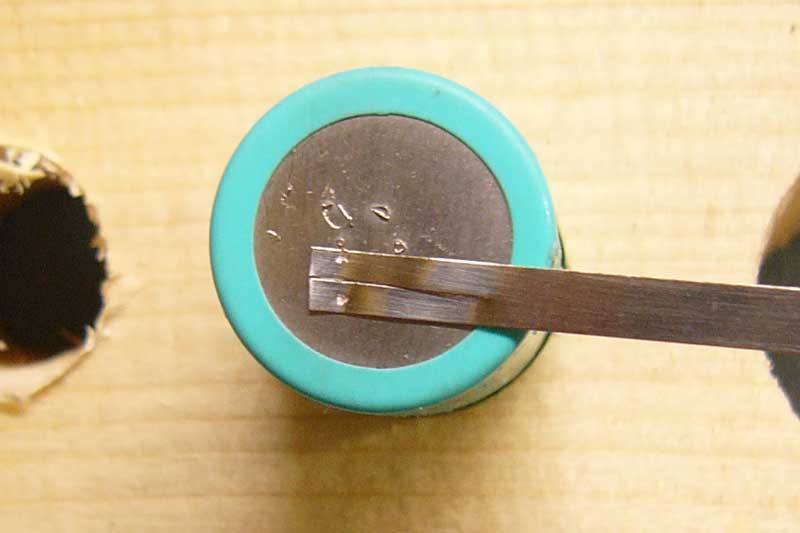
4
In the end it will look like this.
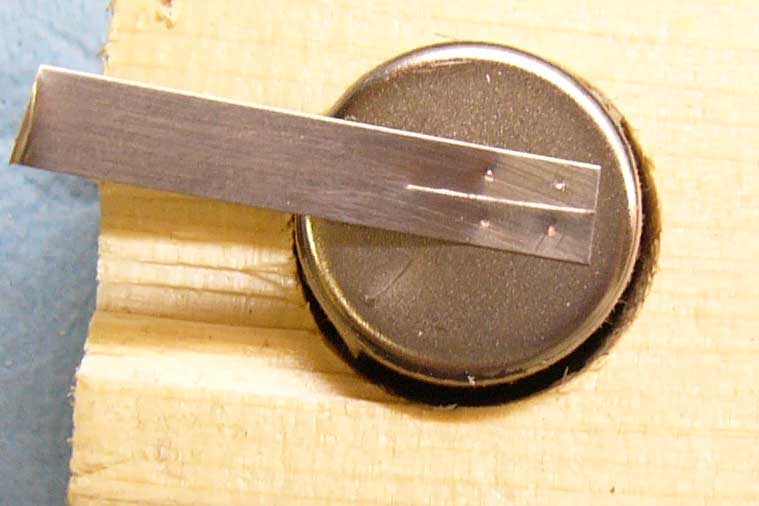
5
Weld in one more place in the same way.
6
Running a high current, a wide and thick tab is effective.
HSW-N25 (w) 3.2 mm x (h) 0.15 mm
1
Prepare the materials. At this time, polish both nickel tabs and the batteries with Scotch Bright etc.
2
Cut a notch at the nickel tab horizontally.
3
Weld it like this.
4
In the end it will look like this.
5
Weld in one more place in the same way.
Before Replacing
the Batteries!
IMPORTANT
Replacing batteries will reduce cost, but it does include some risks. The success point is "appropriate battery selection".
Just by choosing batteries with large capacity does not guarantee any performance improvements. Inner resistance and compatibility with the charger is more important than the capacity displayed.
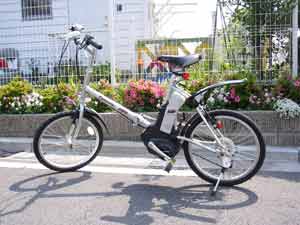
Replacing Batteries of Electric Bicycle Vivi USA - Done in 2006/1, Followed Up in 2007/10
[ IMPORTANT NOTICE ] Dismantling battery pack and replacing the battery involves risks not only of suffering injuries from normal work, but also burnts from short circuit. Also, during battery replacement there is a risk of fire incidence, so please be careful. Yokodai.JP will not be held responsible on the contents nor the results of what are written in the following.
The famous electric bicycle ViVi USA is a folding bicycle made by Panasonic. It uses KY 168 B 02 (27,500 Yen) as its battery.
Since it is a battery for bicycle, it is a challenged to maintain the length of the distance it can travel, and to create a battery set with lower price.
Bicycle and mechanical tools use a high current, thus the battery selection becomes really important. The inner resistance is more important than the battery capacity itself. A battery with more than 20 m per battery cannot be used at all. It is best to have it under 5-6 m. For bicycle, C battery can be used, which makes it easy to replace.
By the way, Yokohama has a lot of slopes; electric bicycle is a must. The first one we bought was Yamaha Pass just after it was released. We used it a lot, but when the battery was about to wear out, the pedal was really heavy so for the last time, full assist? We had to do away with it after remodeling it. The second one was Vivi, which is still being used even now. ViVi USA was the third electric bicycle we bought due to its stylish features.
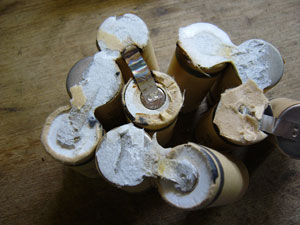
This is a picture of opening the battery pack KY 168 B 02 which comes with electric bicycle ViVi USA.
It connects 20 NiCd C-battery in series.
For the tab, the part touching the batteries is split into two - which caught our attention.
To detect the temperature, it is equpped with thermistor.
In the trunks of our car, we always carry either this Vivi USA or Traincle 7500 with folding titanium frame made by the same company. We are always try to be careful of thieves when we come around Akihabara. (By the way, even one of our friend's was stolen in spite of the lock; it was such a pity since it was about 250,000 Yen.)
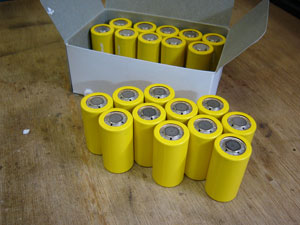
NiMH C-battery
(GP, Made in China)
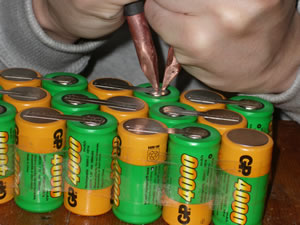
We found NiMH C-battery GP4000 in a store at Akihabara; one for 800 Yen. We bought 20 of them - a total of 16,000 Yen of investment. Since we wanted them to be of the same quality, we bought the ones in the box.
This battery has 1.2 V of voltage with recommended current under 12 A, rechargable with rapid recharge of 2A, 500 times of service life, 6 m�� of inner resistance, and it was included in the standardized goods' list.
If it was possible, we wanted a Made-in-Japan long life batteries with each the same quality, however we could not find them.
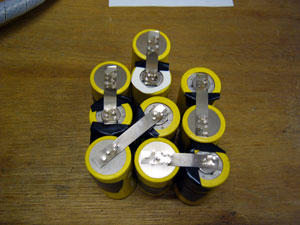
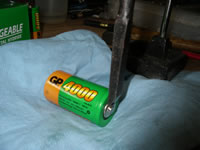
To secure the area for tab welding and to lessen the resistance, we took off the stainless head part with chisel.
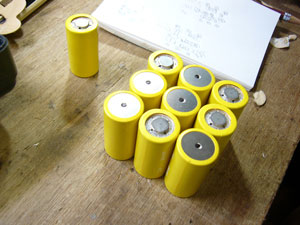
As shown in the left, we welded 3 nickel plates HSW-N25 (3.2 mm in width) in parallel into GP4000. To increase the spot diameter equivalently and to lessen the resistance of the welding part, we spot-welded more than 4 points in every single welding.
(The welding pen is a prototype, thus making it different from the standard ones included in HSW-01/02)
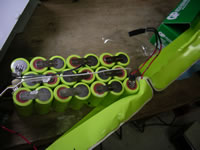
Let's take pictures for reference in setting the battery pack and accurately place the sensor etc.
The ones we assembled was shown in the left down picture. The upper one is the original.
About the result:
For two months the bicycle was used twice a week to travel a distance 50 mins by walking (going down a 40 m-height of slope with an average of 5 mins, and going up a 50 m-height of slope, a total of 15 mins distance). There was no problem with recharging or usage. We could not provide an accurate comparison, but the distance it can travel has certainly increased. (Even for a round-trip, the battery indicator only decreased by one point.) There was no difference in the power used when climbing the slopes.
The next time we want to use batteries made in Japan.
Follow Up Report on This Battery Replacement
Around 2002 Bought it new, used once a week, was kept inside the car, only rode a bit every time January 4th, 2006 Before replacing, traveled a round-trip covering a distance of 2 km with an altitude difference of 30 m. January 22nd, 2006 The battery pack was made and inserted in the bicycle. We felt that "It was certainly just as like when we first bought it". No problems on recharging, the LED was also displayed correctly. < Around this time, we traveled every once a week, covering a distance of 2 km with an altitude difference of 30 m. > April 1st, 2006 From this date, we traveled every two or three times a week. going down a 30 m-height of slope within 3 mins, and going up a 40 m-height of slope within 15 mins; vice versa for the return trip. The battery, once fully recharged, could cover two times round-trip. (During the third round-trip, when the pedal was pushed, the bicycle power led was flashing.) May 21st, 2006 Just as shown in the web page, at this time, "There are no changes after replacement; its condition was even better then when we first bought it". November 8th, 2006 The condition of the battery usage was really good just as mentioned above. NiMH AA battery made by GP has a high inner resistance thus causing a lot of problems, but apparently C battery is good enough. There were no mechanical problems nor electrical problems. April 1st, 2007 The workplace changed, thus it was only used once a week. October 14th, 2007 At this time we felt the battery was getting weaker, but since we only used it once a week for a short distance, we did not have any problems.
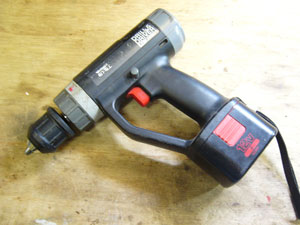
Cordless Drill Driver's Battery Replacement Example
The "Cordless Drill Driver" used here is 12V, using 10 SUB-C NiCd batteries in series.
[ Dismantling the Case ]
To stop the battery pack from being dismantled by common people, it is locked with "torque bolts".
Torque driver can be bought in any Do-It-Yourself stores. However, to keep it safe, the replacement will be done after discharging the batteries for a long time; even then there is a risk of short circuit.
Before Replacing
the Batteries!
IMPORTANT
Replacing batteries will reduce cost, but it does include some risks. The success point is "appropriate battery selection". Just by choosing batteries with large capacity does not guarantee any performance improvements. Inner resistance and compatibility with the charger is more important than the capacity displayed.
Click to Enlarge
[ Genuine Product Appearance ]
The picture on the left is the genuine product from the manufacturer with its outer covering taken off. The paper isulator in the center is burnt from the heat. Even the genuine one produces heat until it was burnt. The right picture displays it with its paper covering taken off. In this picture, a long nickel tab which is connected diagonally with the batteries was the one producing heat. The thickness of the tab is 0.3 mm, but the spot did not seem to be that strong. The battery side were probably weaker.
[ Battery for Replacement ]
These were SUB-C NiCd batteries used for replacements. Once case contains 20 of them. The covering is made of a thin plastic film which requires an extra care since it is different from the standard product. Comparing the outer covering, the genuine ones are protected by a thick protecting layer, with the same diameter as the replacing ones, thus the genuine product's battery size was a bit smaller than the ones bought.
[ Replacement Battery Specs ]
Capacity: 2400 mAH
Height: 43.5 mm
Diameter: 22.9 mm
Inner resistance: 4.5 m��
Voltage: 1.2 V Weight: 60g
Discharging current: 30 A
Manufacturer: SANYO (JAPAN)
The replacement NiCd battery used here can be bought easily in America, however in Japan it is difficult to buy it separately.
At Yokodai.JP, we provide the batteries too. We deliver batteries which have all cell characteristics.
[ Genuine and Self-Made Battery Price Comparison ]
A price comparison between buying a new, genuine one and replacing only the batteries. The tab and welding costs and workload are not included.
Genuine 15,800 Yen
Self-Made @600 x 10 = 6,000 Yen
Let's take pictures or notesfor reference in setting the battery pack and accurately place the sensor etc.
[ RESULT ]
The ones we assembled was shown in the left picture. The right one is the battery pack with indicator, whose batteries would also be replaced afterwards.
The result is, well what do you think?
The tool is used to drill drive with round saw, and there were no problems in recharge nor usage. There are not any precise comparison, but the power and the length of usable time did not change compared to when the genuine one was used for the first time.
The next time we will do in the same way during replacement.
Here is the model with indicator. The connector for signals increased.


![���]�ԑg�d�r�ʐ^](../image/batSetBicy.jpg)